Frequently Asked Questions
Can’t find what you are looking for? Then send an e-mail to sales@createyourworld.co.uk and we’ll try to help you!
Can’t find what you are looking for? Then send an e-mail to sales@createyourworld.co.uk and we’ll try to help you!
In a nutshell the surface needs to be flat, smooth and clean. Avoid textured, damp and dirty surfaces.
SUITABLE SURFACES
SURFACES TO AVOID
And possibly
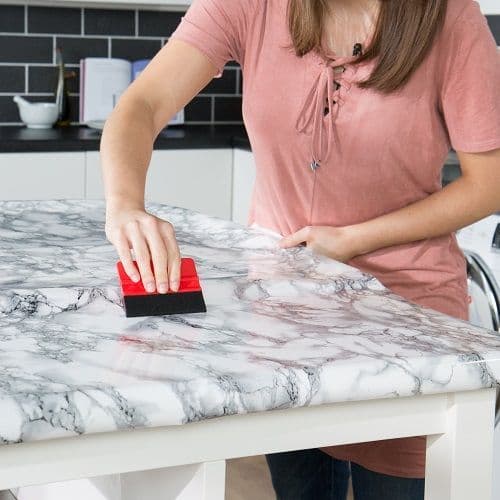
Apply only 10cm of vinyl at a time.
Use a d-c-fix smoother to push the bubbles out to the side.
Lift the vinyl and reapply, d-cfix is repositionable during application.
Lightly spray water on smooth surfaces like glass or appliances, this aids the application.
Prick small bubbles with pin to release any trapped air.
Yes to 75°C, it can withstand temperatures from -10°C to 75°C.
Use worktop savers for pans. Don’t use sharp knives on the vinyl. Hot plates and cups are fine.
Yes, using normal household cleaners.
Yes!
Peel back to remove. Adhesive residue can be removed using ethanol or warm soapy water.
If the vinyl is stubborn, heat first using a hairdryer and it should peel away much more easily!
Yes, if you follow these tips…
Ensure the surface is thoroughly clean.
Cover the whole surface first leaving the bevelled or curved edge until last.
Use a hairdryer to soften the vinyl, making it more pliable.
For curved edges, gently pull vinyl over the surface and tuck it underneath.
For bevelled doors use a soft cloth or d-c-fix smoother to push the vinyl into the groove.
Yes, but use silicone sealant over the edges and joins in wet areas.
Yes, but it may only last a few years in the elements.
Clean flat glass such as windows, patio doors or shower screens.
Cover a glass table top or cut out your own shapes using a plain design!
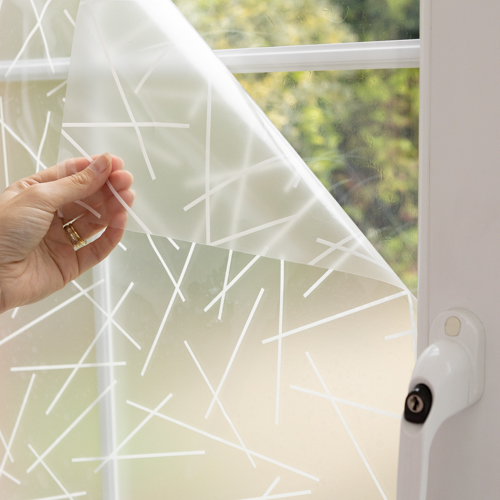
The vinyl has a static side which, when peeled away from its backing paper adheres to the glass. Water is used to slide it into position, which later dries out to leave the vinyl in its place.
Cut the vinyl 2mm shorter than the surface. It needs to be in contact with the glass to adhere, therefore keep away from the window seals!
Yes!
The beauty of static cling window film is that it can be peeled off without leaving any residue and re-applied using water.
Easy!
Simply wipe clean with a damp cloth or use a non-abrasive detergent. Another benefit is that it’s really easy to keep clean, unlike dust collecting blinds!
Privacy – Ideal for overlooked windows or to block out unpleasant views, with no loss of light.
Protection – 95% UV protection, which helps prevent fading of carpets, curtains or furniture.
Decoration – Add decor to plain glass quickly and easily. Budget friendly – cheaper than traditional window dressings.
Windows, glass doors, glass tables and shower screens. The glass needs to be clean and smooth (it will not adhere well to textured or bevelled glass)
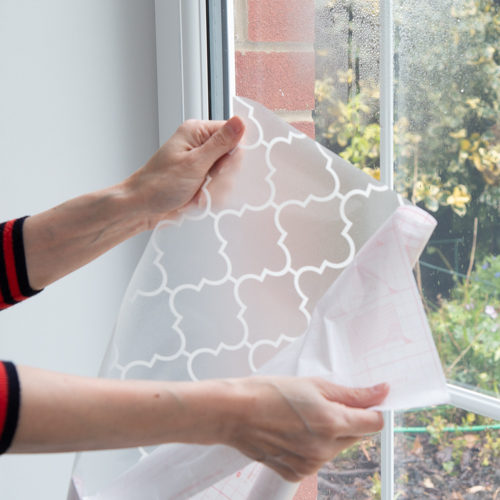
Yes, adding a couple of drops of washing up liquid to water and spraying this onto the glass can aid application. Use a smoother or squeegee to push the excess water out to the edges and dry with a cloth. The water may make the film go cloudy to begin with but should dry out within a few days.
When cutting the film, leave a 2mm gap around each edge to ensure it doesn’t overlap the window seals.
The film needs to make 100% contact with the glass to fully adhere.
Yes, the film can be removed.
To make it easier apply a little heat using a hairdryer.
Any residue can be removed with ethanol.
Window films provide privacy and decoration on a budget. Ideal for small or awkward shaped windows which can be hard to dress with conventional blinds or curtains. Window films don’t gather dust like blinds, allow the light to shine through and provide a streamline contemporary look to your décor.
In a nutshell the surface needs to be flat, smooth and clean. Avoid textured, damp and dirty surfaces.
SUITABLE SURFACES
SURFACES TO AVOID
Use normal household detergents to clean the floor tiles. You need to wait 5 days for the adhesive to bond but after that you can vacuum and clean as normal.
The vinyl surface is water resistant but it’s important that water doesn’t get underneath the tile as this will compromise adhesion.
Simply score with a utility knife and snap to trim the tile to size. Peel away the backing paper and press formly into place.
The tiles are not manufactured for this purpose but if you choose to use them as a splash back you will need to use extra adhesive.
Yes, they are fully removable. Any residue can be removed with ethanol. If you lay a tile incorrectly you can peel it back off and re-position. The adhesive becomes stronger over time and takes a few days to bond fully.
In a nutshell the surface needs to be flat, smooth and clean.
SUITABLE SURFACES
SURFACES TO AVOID
The tiles are heat resistant up to 50°C but should be kept 30cm away from direct heat such as gas flames. Induction hobs are ok.
Yes, the surface is water resistant and can be wiped clean with water and mild household cleaners.
You need to prevent water from getting underneath, as this will compromise the adhesive and it may start to lift .
To avoid this, always use a clear silicone sealant around edges and joins when using in wet areas such as shower cubicles and around sinks and baths.
Yes, use a hairdryer on a low setting to soften the adhesive. Any residue can be cleaned off with ethanol.
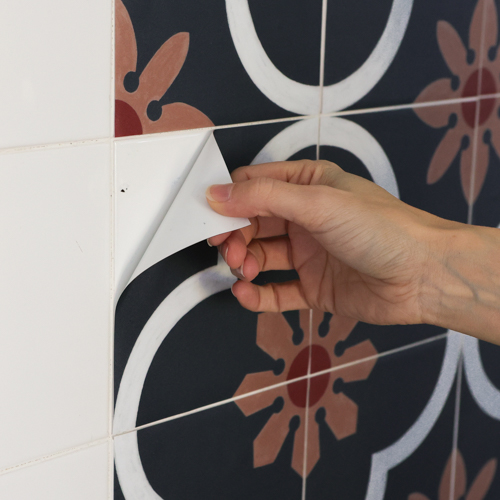
Tile stickers are perfect for covering up old or outdated FLAT wall and floor tiles. A great alternative to painting or even replacing your tiles, tile stickers add both design and colour to instantly transform the look of your kitchen or bathroom in a few simple steps.
Tile stickers are designed to fit neatly over the top of your existing tiles, leaving the grout lines uncovered. If your grout is in need of some attention, tile paint or a grout pen can be used to freshen it up.
How to Apply Quadrostyle Tile Stickers
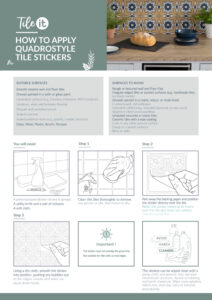
Suitable surfaces:
Surfaces to avoid:
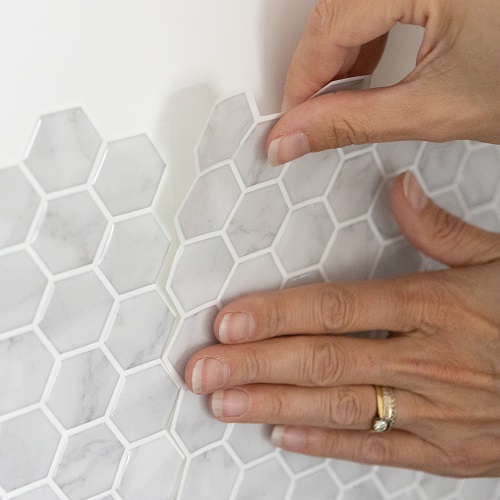
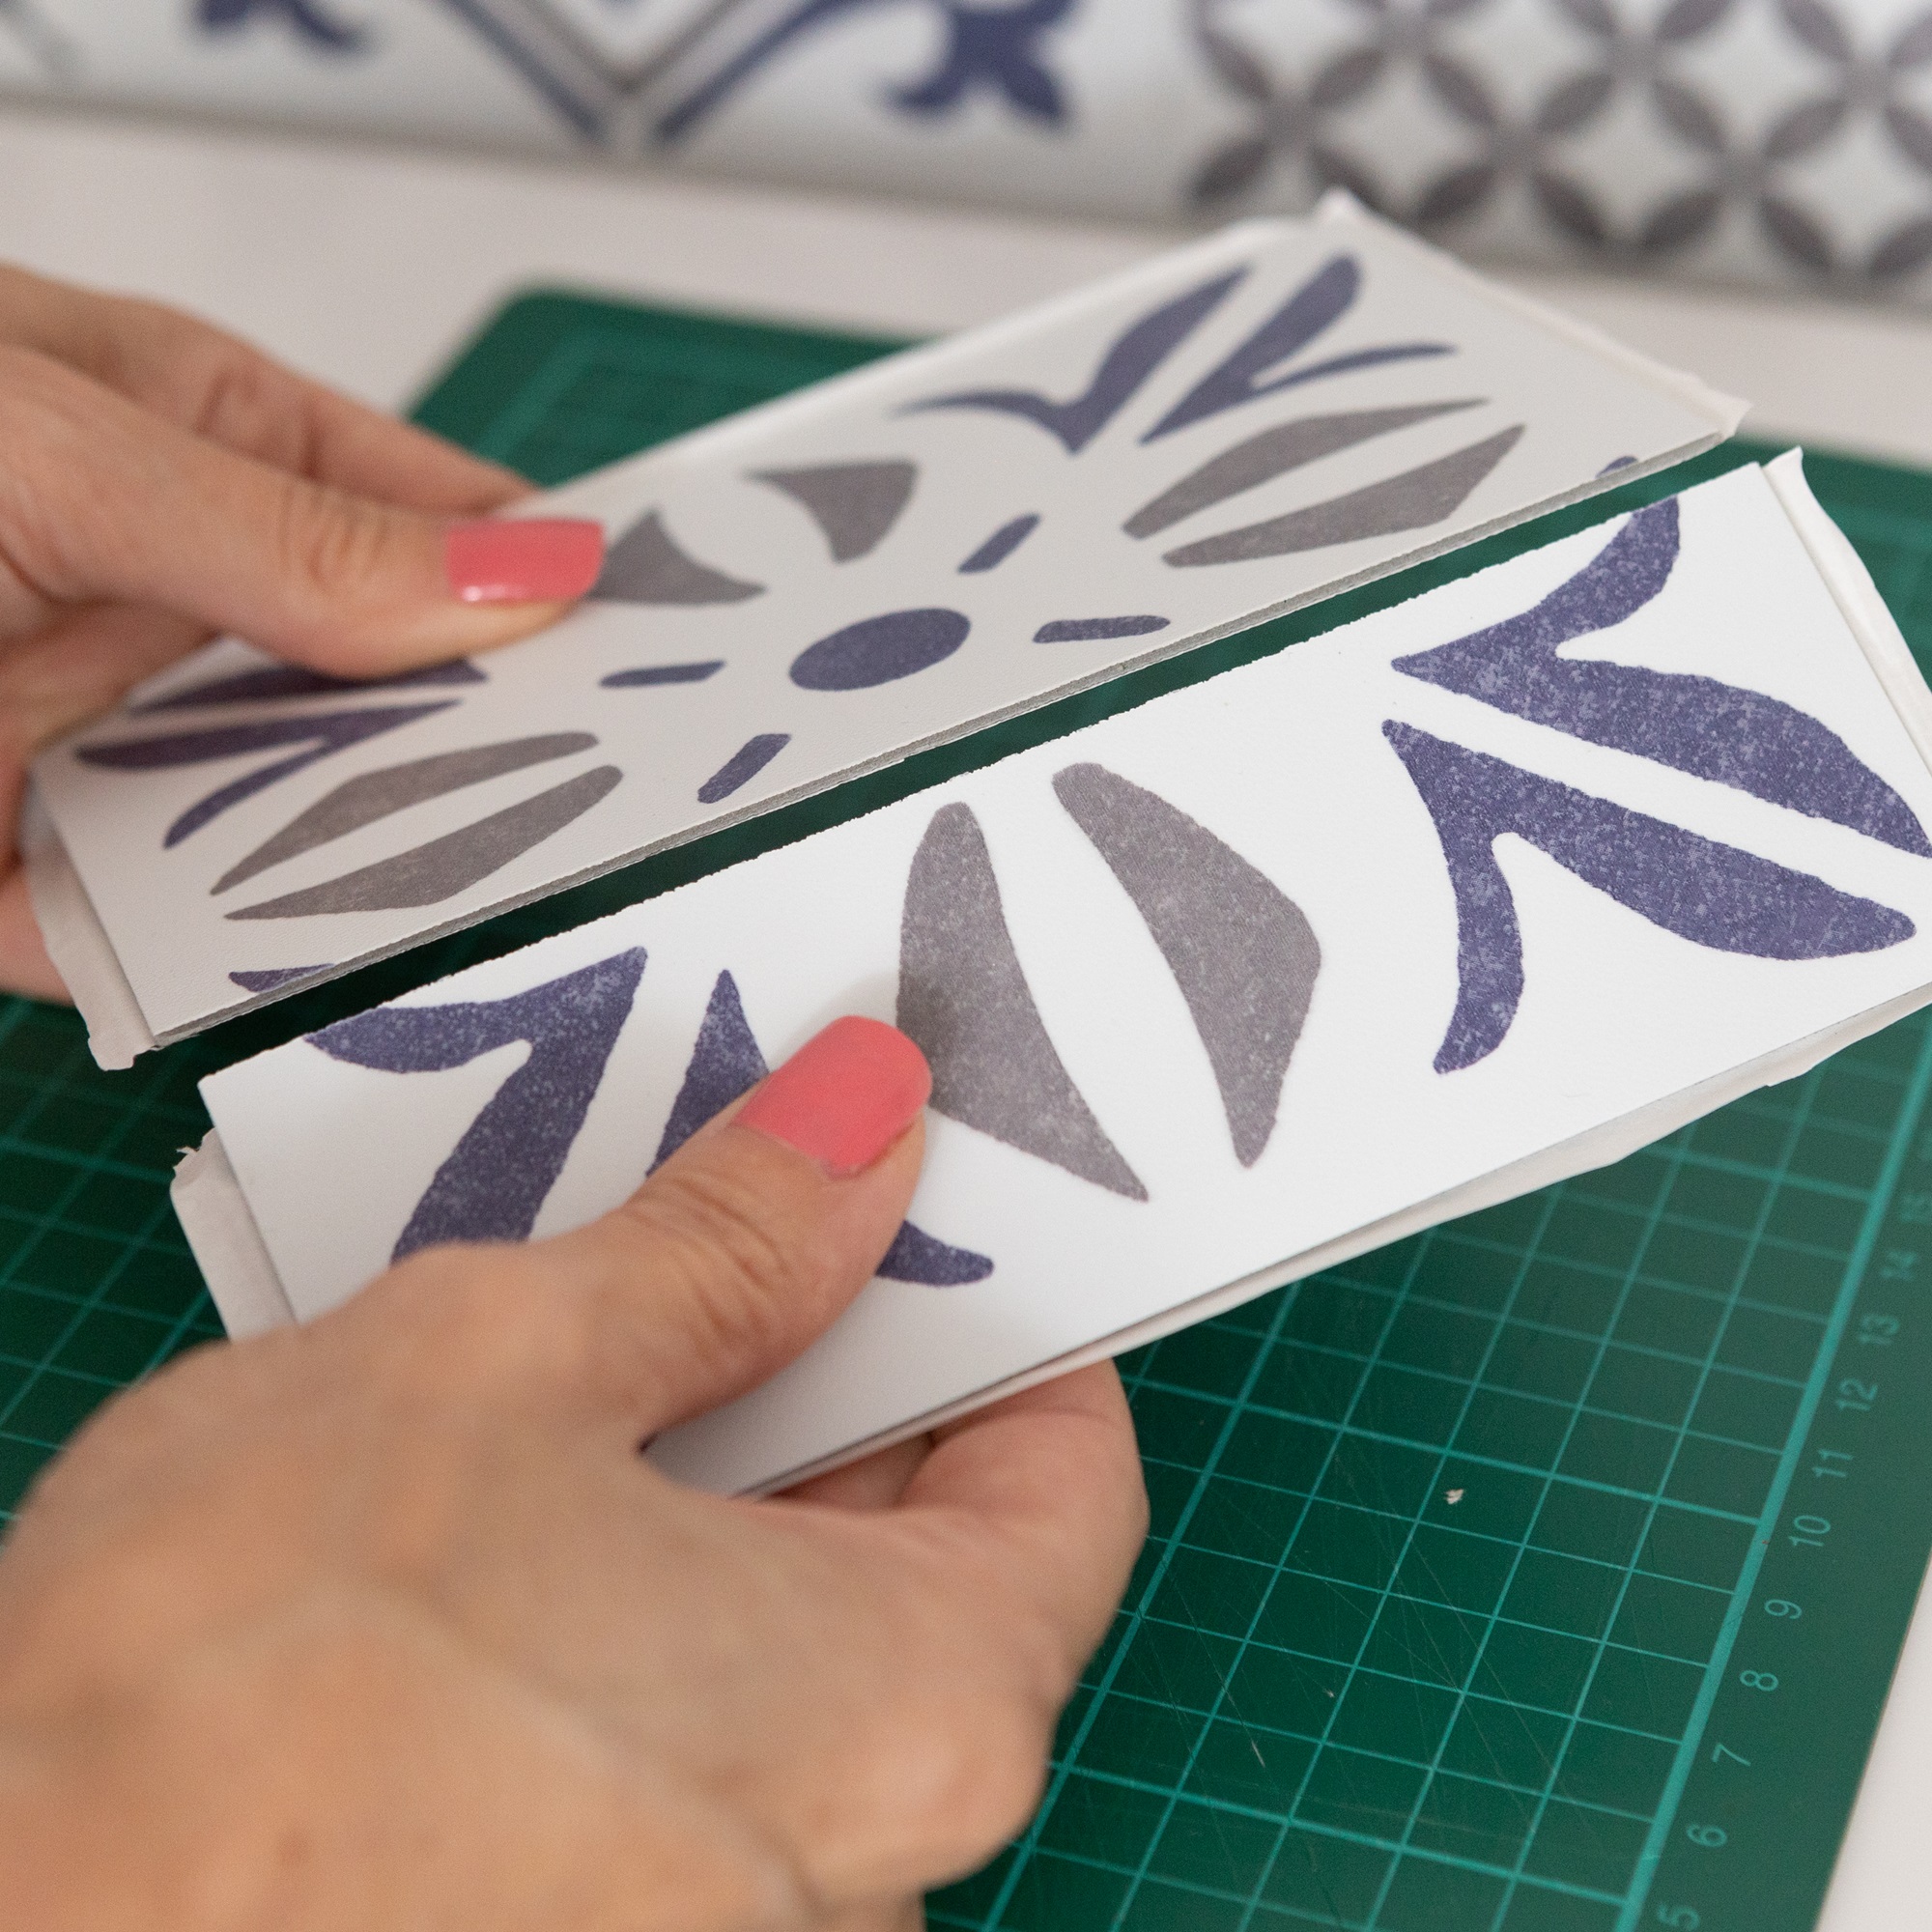
Ensure all 4 sides of the sticker are in contact with the tile. A 1-2 mm gap around each edge of the sticker is ideal to ensure the sticker doesn’t overhang the tile. Rounded tile edges are not suitable. Stickers should not be placed over grout UNLESS the grout is level with your tile and no wider than 3mm.
We do not recommend using tile stickers to cover non-tiled surfaces for a few reasons: 1) It is almost impossible to line tile stickers up perfectly with no gaps or overlapping, 2) the final effect will not have grout lines and 3) stickers may peel up at the corners over time.
Yes! the stickers can certainly be used over floor tiles. Just make sure you don’t allow them to sit in water (eg base of shower), don’t use them on heated floors and take care when moving furniture around.
The low-tack adhesive used on our stickers means they can be re-positioned during application and when it’s time to remove them, they come off very easily, leaving no residue. Ideal for renters!
Yes, as long as the sticker is in 100% contact with the tile and not overhanging the grout lines, they can be used in wet areas such as shower cubicles if applied correctly.
You need to remember that the stickers are vinyl so direct contact with heat is to be avoided. We recommend keeping the stickers at least 10cm away from a direct heat source. As a general guide, if something gets too hot to touch, it is too hot for a vinyl sticker!
The stickers have a UV laminate coating which helps prevent fading.
Yes, but only if the surface doesn’t get hot! Not suitable for open fires.
Use a general household cleaner. Avoid scrubbing and harsh, abrasive chemicals. Wipe off any splashes that may stain immediately, such as tomato or curry.
Suitable surfaces:
Unsuitable surfaces:
Yes, there is a membrane on two adjacent sides of the tile which remains in situ to form a barrier between the tiles and prevents water getting behind.
The tiles can withstand a maximum temperature of 60°C. They can be used behind an electric or induction hob but not suitable near open gas flames. The temperature on the wall behind the hob shouldn’t exceed 30-40°C whilst cooking.
Yes, the tiles are waterproof if applied correctly, so can be used in shower cubicles and around baths and sinks.
Simply score with a utility knife and snap the tile, click here to see a how to video: https://www.youtube.com/watch?v=MKkxPUbIusM
If you need to fit around a socket or other obstacle, click here to see how it’s done: https://www.youtube.com/watch?v=BbYy8j4VDO0&t=67s
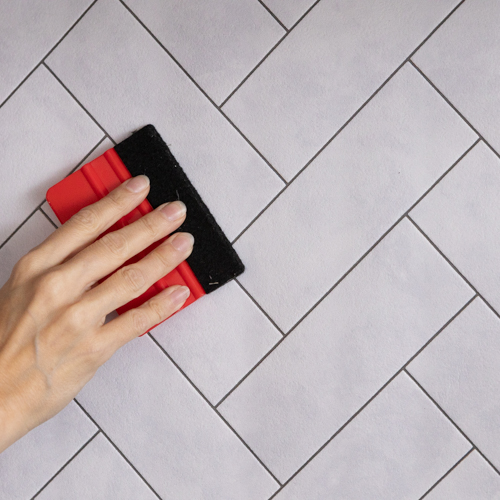
Use standard, non-abrasive household cleaners
Use a flat head screwdriver to wedge behind the tile then peel it off the wall. Use ethanol to remove any remaining residue.
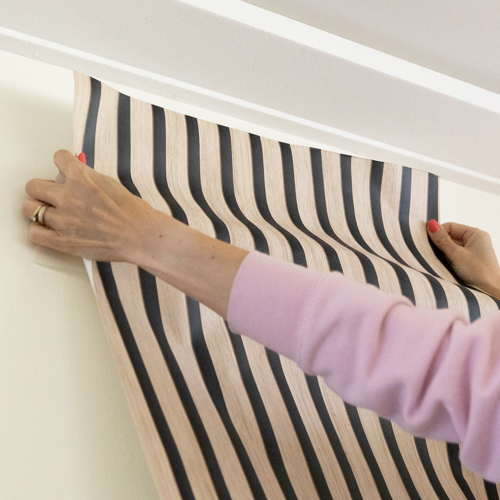
Please refer to our how to guide
Wipe clean with a damp cloth, do not over soak the wallpaper, it may become damaged.
Slowly pull the edge from the top corner directly downward. The wallpaper is fully removable.
In a nutshell the surface needs to be flat, smooth and clean.
SUITABLE SURFACES
SURFACES TO AVOID
Dirty/ dusty / damp / textured surfaces
Yes, it can withstand temperatures up to 75°C. However, the wallpaper is made of PVC, so you need to avoid contact with direct heat such as gas flames.
Yes, the wallpaper is ideal as a splashback. It’s applied horizontally as one long length rather than verti cal strips (like conventional wallpaper), so you get less joins. Just remember to seal around the joins and edges.
Yes, the surface is water resistant and can be wiped clean with water and mild household cleaners.
However, you need to prevent water from getting underneath, as this will compromise the adhesive and it may start to lift .
To avoid this, always use a clear silicone sealant around edges and joins when using in wet areas such as shower cubicles and around sinks and baths.
Yes! This is what makes this product so unique. It can be used over smooth flat tiles so you avoid the expense of re-tiling.
Yes, the wallpaper is fully removable. Any residue can be cleaned off with ethanol.
Floors, walls, furniture and even outdoor paths and patios.
You will need to jet wash the existing slabs or concrete to get it clean before starting the job. If the surface is dusty, brush away the dust before you start painting. Note: if working outdoors choose a calm, dry day with no wind to avoid dust and dirt being blown onto the wet paint.
Use a masonry paint (in your chosen colours-base and accent colour) You may need a couple of coats.
Important! Make sure you read the paint manufacturer’s instructions with regard to temperature for application, cure time and time between coats.
Once painted you MUST use a clear patio & paving seal for protection.
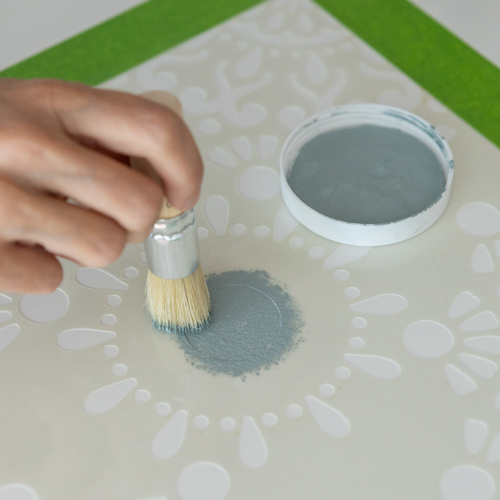
First use a primer then apply a couple of coats of base using a roller. The base coats need to be completely dry before stenciling (it is recommended to wait 24 hours). The stencil paint can be acrylic, latex or chalk paint (read the manufacturer’s guidelines on usage) but the most important part is to seal the paint with a couple of coats of good quality CLEAR water based polyurethane varnish.
When painting a floor, you need to be aware that there may be some wear and tear, meaning that it may not be as hard wearing as real tiles or patterned lino. However, the key thing is to seal the floor properly with a good quality varnish (for indoors) or a patio & paving seal (for outdoors).
The top tip to prevent bleeding is to ensure you don’t have too much paint on your brush or roller. Do a test on some paper before you begin stenciling to get used to knowing how much paint to apply. Any bleeds can either be painted over or touched up afterwards with a fine paint brush.
Note: paths and patios tend to have a textured, bumpy surface therefore you won’t be able to achieve completely clean, crisp lines on this type of surface. It all adds to the character !
Each stencil has one full motif within the outer border so on un-tiled surfaces, simply line the stencil up with the area already painted, working in a grid formation. If you are stencilling on tiles, just use the existing tile as your guide.
Stenciling is a job for the patient ! It can’t be rushed -you need to take your time! It is quicker and easier if you have two stencils to work with so when one is drying you can use the other.
If the whole motif is ruined just paint over it with your base coat once the stencil paint is dry. You will have to wait for the base coat to completely dry before you try again. If it’s a minor mistake, you may be able to wipe the paint with water.
![]()
![]()
© 2026 Create Your World. Company registration 11165590.